About

Showing posts with label paint. Show all posts

Sunday, April 8, 2012

Loving this Makeover!

(all photos via houseandhome.com)

Happy Monday!  I see plenty of before and afters and some are predictable and some really knock my socks off.  I found this makeover at House and Home and I truly love everything about it.  I found myself going back and forth between the befores and afters and thinking, "How did she do that?"  Here are some things that I particularly love:

1.  I think her place before was something we can all relate to.  Not awful, nice bones, but they really didn't reflect any style or personality.  I think we all have or have had rooms like these.  How inspiring to see how furniture placement, paint and being selective with choosing some really interesting pieces can just really change a space COMPLETELY!

2.  Painting the trim and wall the same color.  I know I tend to think, "Oh I want to highlight the trim or the crown molding, so I purposely choose a different wall color.  But after looking at several of her rooms, the thing that really makes the room seem bigger and the walls almost recede and seem endless is that there's no definition between, wall and window.  Except for the bathroom, it shows how interesting white walls and trim can be!  Inspiring if you can't or don't want to paint.

3.  Texture!  We've heard all designers talk about texture, but it really does make a space come alive.  Check out each of Emma's rooms... Maybe with the exception of the bathroom, every space as a bit of nature (trees, branches and flowers) , metallics (gold or metal finishes), sleek, hard surfaces and lots of soft throws and furs.

Enjoy these pics!  Thanks Emma for the inspiration!  And click over here to see the full house tour.

Living Room BEFORE

Living Room AFTER
Loving the fig tree, stacked logs, wire chairs and furs

Kitchen BEFORE

Kitchen AFTER
Loving the dark floors, (maybe slate?) and the marble backsplash!
Also, contrasting counter tops.. white on the cooktop side and dark on the island.

Chalkboard door.
What's not to like.  Great place for chalkboard paint if you don't
want to invest in painting a whole wall.

Dining BEFORE

Dining AFTER
Loving the sharp contrast between white and black. 
Another great tree and bold, oversized art.  Too often, artwork is too small.

Master Bedroom BEFORE

Master Bedroom AFTER
Loving the scale of the 2 pieces of artwork and the placement of the bed.
I wouldn't have thought of that, but oh so cozy!  Great textiles too!

Bathroom BEFORE 

Bathroom AFTER
 I actually thought it wwas pretty good to begin with... but...
Loving the blue/black paint and the shower curtain!!
( if you're curious... paint is BM, Raccoon Fur)

Monday, March 12, 2012

Spontaneity

Yes... it's 11:00.  Yes...I've decided to paint the walls in our kitchen.  Yes... I could very well be nesting.  :)

Sometimes when inspiration (or energy) strikes, we just need to take advantage of it.  I've been thinking about changing the paint color in our kitchen for awhile now.  I like the soft, minty green, but I'm just ready for a change.  Why not just do it?!  So... I got some left over paint and was able to get most of it done in about an hour and half while catching up on a couple of old Martha Stewart shows.

I'm calling it a night.  Tomorrow, we'll have to get out the big ladder and finish up the ceiling trim.  Paint.  It really is THE easiest eay to update a space AND free if you're using left over paint! 


Thursday, October 20, 2011

Our *new* Dining Chairs

Hey folks!

Here's part 2 of some change we've made in our dining room.  We're really watching our budget these days and I was looking for a way to get new dining room chairs for cheap.  I found these chairs at Goodwill and made them our kitchen chairs.  So then I gave our old kitchen chairs a makeover and they become our new dining chairs.  All in all, I spent about $100 on the chairs and fabric and now have 4 *new* chairs for the kitchen AND dining room.

BEFORE:
Simple IKEA dining chairs that we've had for almost 10 years. 
Not sure of the name, they don't seem to carry these anymore.


AFTER:
An easy project of recovering the seat cushion and making a slipcover for the back.  Nothing too fancy, but a nice inexpensive upgrade.  This will do for awhile.  :)


THE PROCESS:


This is how I always start painting my chairs.  Prime first.

As you can see, I did a shortcut.  I knew I'd be slipcovering the top, so I didn't bother painting the back.  If I wanted to be real thorough, I probably could've and that would've given me the option of taking the slipcover off. 

Recovering the seats

Here they are, 1/2 way done.  I just used left over gray paint from the dining room.  Worked perfect.

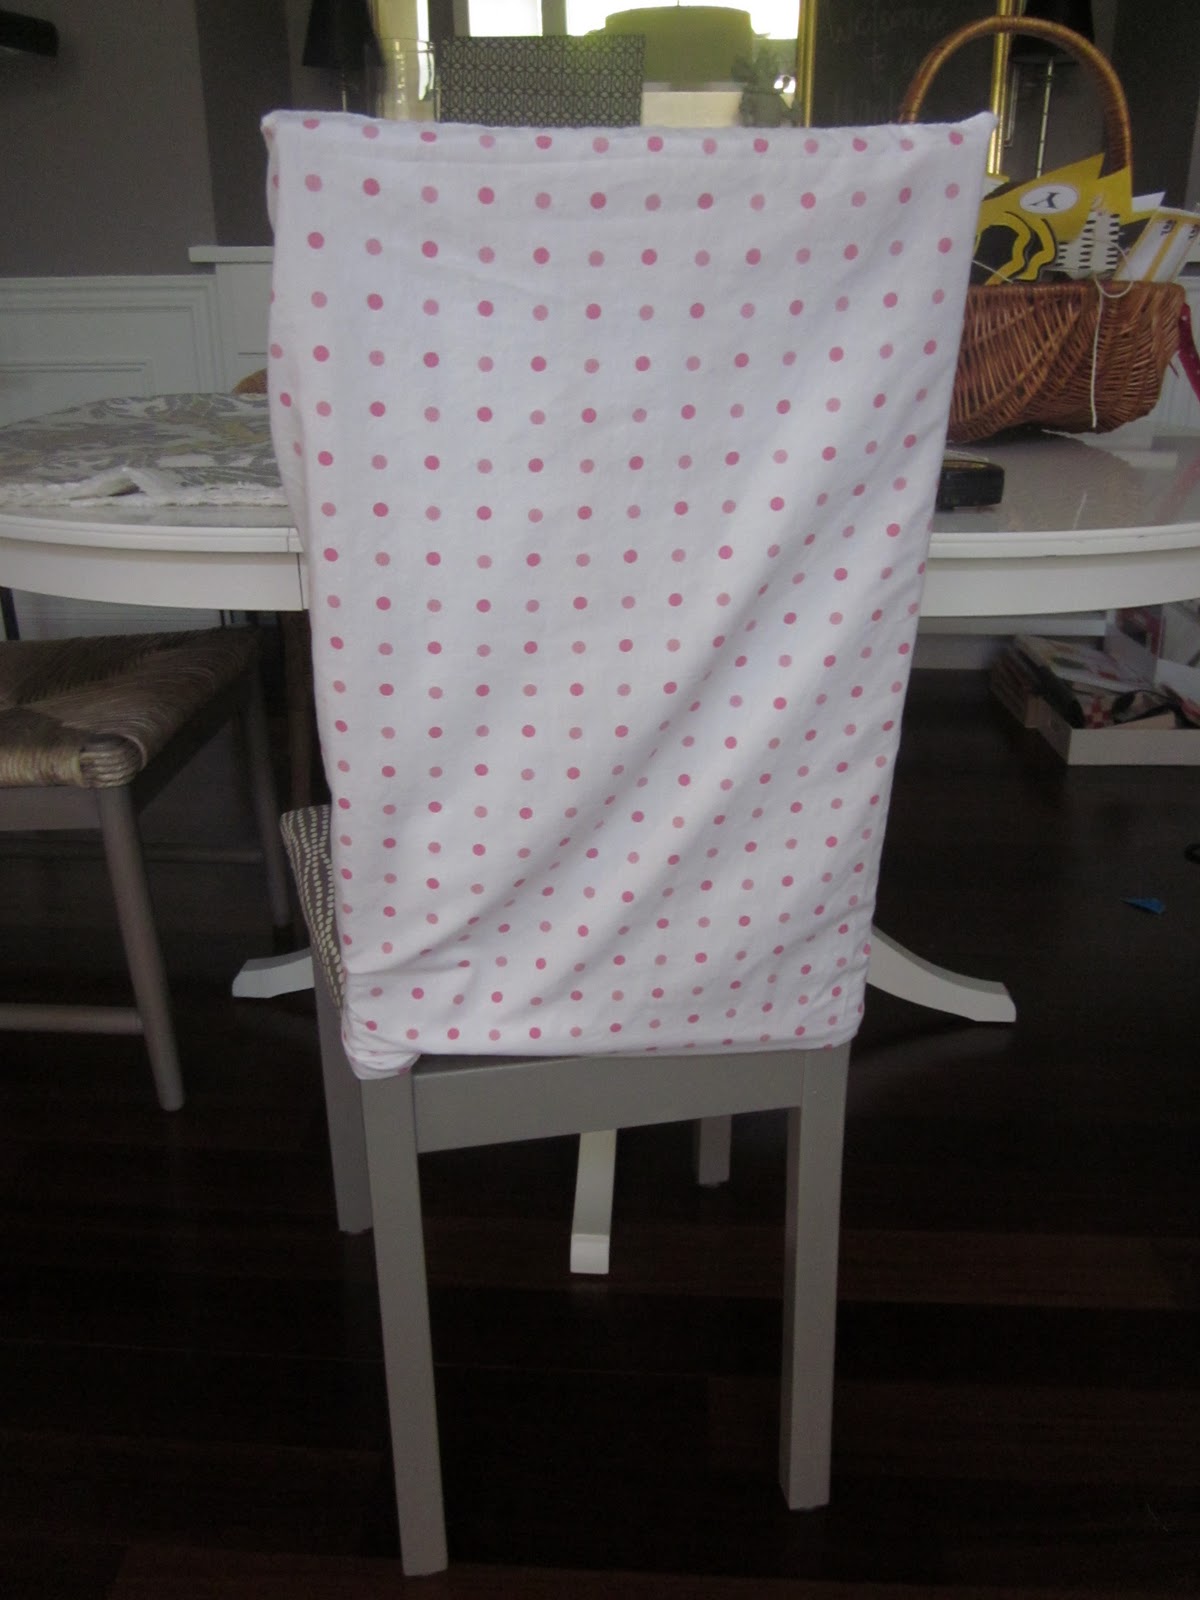
I slipped a pillowcase over the chair just to get a feel for the finished product.  This was my inspiration for the slipcover.  I don't really sew, so this is about as much as I can handle.

My humble workspace.  :)

Ta Da!  I like the contrasting fabric of the seat cushion and back. 
It's one of those things that is a bit off, but I think it gives it some interest.

The fabric was Waverly Bedazzle Silver Lining.  Found it Joann's for 50% off, $24.99/yd.  Love the slight ikat pattern and the yellow/gray was just right for the room.  Sorry, couldn't find the name of the seat fabric.  It was in the same section, all coordinating fabric with the Bedazzle. 


Lastly... a quick painting tip.  It was SUPER easy to paint my IKEA laminate chairs.  The primer went on smooth and so did the paint.  If you've considered painting your IKEA laminate furniture... do it, it's so easy!

Monday, October 3, 2011

My Weekend ... Paint and Shelves

Ok... I'm realizing I have a serious problem and I'm going to call it "projectitis".  :)  This condition causes me to have an insatiable desire to paint, move, reorganize or redo spaces in my house. When I look around my house, I'm usually thinking...

"hmm... I wonder what that would look like in a different color?  hmmm... I wonder how that would look if I moved it over there..."  "hmm... how about wallpaper... window treatments?... hmmm..." 

The prognosis... I will live in a very well-loved home, pouring myself into every nook and cranny... but, I will probably never see my home as finished and be able to put the paint brush or tape measure down!  Do any of you suffer from this same condition?  :)  Oy!  It's both a blessing and curse I tell ya.

Last week I wrote about adding some more contrast to my all white kitchen... I've been thinking about it ever since.  I didn't paint my cabinets black yet, but this afternoon while the kids napped... I decided to paint one wall.  Carpe Diem right?  What used to look like this:


Before: 
Our kitchen walls are a soft, light green. 
Grecian Green by Benjamin Moore

Now looks like this:

After:
IKEA EKBY shelves
Paint:  Galveston Gray by Benjamin Moore


A few thoughts on this project:

  • This truly was so easy and didn't cost a thing.  I just used paint left over from the dining room.  I LOVE this gray.  It's Galveston Gray by Benjamin Moore.  It's a wonderful, cool-gray.  Using left over paint in different areas of your home is not only economical, but it allows your rooms to flow nicely from one to another. 

  • I really didn't mind the children artwork on the wall.  This is a designated kid zone.  But I wanted to add shelves because I don't have a place to put the kid projects that need to sit somewhere rather than being taped up. I have a whole wall where I tape things up.    

  • While at IKEA picking up the brackets, I was really debating whether or not to go for white or black.  I decided to go with black.  So glad I did.  White would've worked and would've been the safe choice.  I LOVE the contrast of the black, against the gray wall in my all white kitchen.  The risk paid off.

Sorry for the grainy, un-styled pictures.  But at this point, if I wait to style each photo and try to get the perfect shot, I may never get to posting a single project.  Hope you get the idea.  Trust me... I'll be styling away in the days ahead.  :) 

Last Friday, I wrote about doing something over the weekend that made your heart sing.  This is what did it for me.  A mini-makeover that breathed new life into a tired corner.  What about you?

Thursday, September 15, 2011

IKEA Fridays - Meet ARYD

After all the painting I did a couple of weeks ago, I'm even more convinced that anything can be given new life or personality with a simple coat of paint.

For example, the ARYD Candle Holders which range in price from $7.99 - $14.99 could really be transformed into something oh so chic.  I love how substantial they are and its gorgeous curves.


They could easily look like these Chroma Candle Holders from Anthropologie, but even better.  The Chroma goes for $28.00 each and I actually like ARYD better with its chunkiness and you can group them with varied heights and widths. 


Painting these would be so easy using sample pots like these from Benjamin Moore. 
(I have a least a dozen of these laying around)


Or a good ol' can of spray paint. 


Hope this inspires you to create something fabulous!

See you Monday!

Thursday, September 8, 2011

Painting Chairs... My Tips and Tricks

I'm by no means an expert in painting furniture, but I have gotten better with each project and I definitely learn something new everytime.  Here are some things I learned this time around:

Tip 1:  PRIME!  PRIME!  PRIME! 

This is a step not be skip or scrimp on.  Apply 2 coats to give your paint a great base to adhere to.  It'll save you lots of repainting later on.  My other dining chairs were IKEA laminate and I primed and painted them and they look great.  I use KILZ and it seems to do the trick.


Tip 2:  Foam Brushes are Fabulous! 

I've always disliked cleaning brushes.  No matter how much I rinse them, they never get as clean as I'd like them to be.  This time, I primarily used foam brushes and they worked great!  I got mine from the hardware store, not sure if these are more durable than the craft ones.  They were only 79 cents each!  They spread the paint really well, with minimal brush strokes and I feel fine just tossing them when I'm done.


Tip 3:  Plastic Wrap is your Friend! 

Between coats I used to spend lots of time rinsing out my brush only to start over in a few hours or the next day.  It was a tedious step.  I've seen other people wrap their trays and brushes with plastic wrap and it stays moist and ready to use for the next application.  You can save the thorough clean up till you're done with the whole project!  It really works, I saved my primer in a tray for about a week and still worked great.  It was so nice not to rinse brushes between coats.


Tip 4:  Don't forget the Polycrylic Finish. 

It creates a nice smooth finish and protects all your hardwork.  Much like primer, it's a step that pays off to not skip.  You need to be careful when you apply poly, it is quite viscous so it's easy to get drips, yet you want to load up your brush enough so that you're not going back and forth on your piece which causes brush strokes.  Only practice makes perfect, you'll end up finding that perfect balance of a lightly loaded brush and be on the look out for smoothing out any drips before it dries.  I liken it to driving a stick.  I attempted to learn, but couldn't find that sweet spot between the accelerator and the clutch. 


I usually started like this to paint the underside and the legs.

There you have it.  A few small things that have worked for me.  Repainting what you already have can give new life to your furniture without spending very much money.  If you're scared, buy something at a thrift store and just give it a try.  I painted my chairs over 2 nights.  1 night for priming and painting.  2nd night for the poly.  It's totally doable!


Then I flipped them like this to paint the top half.


Tuesday, September 6, 2011

Kitchen Chairs - The Reveal


Has the suspense been killing you?  Have you been staying up at night wondering if I went with white or green?  :)  Well I put in some over time decorating hours this past weekend and the chairs are now done!

Last Friday I posted pics of these thrift store chairs in a rather sad state. 


Here they are today.


I'm very happy with them!  Such a great shot of color and it's such a happy green.  I went with Lemongrass by Behr at Home Depot.


Not too far off from my inspiration pic:


(via tilthrestaurant.com)

It's funny, I went to this restaurant last year and the food was good, but what really stuck with me, was how much I loved their lovely green chairs.  Clearly, you know which of my 5 senses are more attuned. 

I'll be sharing more pics tomorrow documenting the process and some of the tricks I picked up while painting.

Last, but certainly not least, thank you so much to everyone who gave me feedback through a comment, email, text.  It was so fun to hear from so many of you!  Green was by far the most popular choice and it gave me the confidence to go for it.  Painting with bold colors is scary, even for me! 

This got me thinking... wouldn't it be fun AND helpful to be able to send me pics if you're in a design dilemma and I can post them and have people comment and give feedback.  I could see it as a regular column?  Sound fun?  Well... if you have a design dilemma, send me a pic and we'll see what happens!  :) 

I think that's the beauty of developing a great online community through blogging, being able to help and encourage each other to solve problems and live better.

picketfencedesign@gmail.com

:)
 

Wednesday, August 17, 2011

White Trim - What a Difference!

We all love a good makeover right?  It's even better if it's a low budget, high impact sort of thing.  Here's a link to a great post I saw on Emily A Clark showing what a huge difference just painting trim can make.  It's pretty dramatic, check out all the before and afters!


This is such an easy and fresh way to update an entire space for just the cost of paint.  If you're living with brown trim and want an update, go for white... you won't be regret it.  This is easily a weekend project and you'll be amazed at how fresh and new your whole space will feel!

Tuesday, June 14, 2011

How To Paint a Scalloped Border

So here it goes, pictures of Evie's ceiling project.  I love how the final product turned out.  It's fresh, a little whimsical and just happy.  Again, the color is Robins Nest from Benjamin Moore.  The final picture doesn't quite do it justice.  It looks much better in person, and there are many more projects left to do.  You'll notice that the ceiling light is next on my list.  :)


This project was fairly easy.  I broke it down into several steps and each step took about an hour and a half.  Most of time I started around 11 and ended up in bed at a somewhat reasonable hour.  :P  The actual painting part was pretty easy and surprisingly relaxing, especially with the house being so quiet.  I used a 1 1/2 in. stiff angled brush.  Worked great!


Here's how I did it:


The white trim was actually an after thought.  I was not completely sold on the scalloping initially and was a little worried.  I was hoping that a little white paint would jazz it up and it totally did the trick!

LinkWithin

Related Posts Plugin for WordPress, Blogger...