About

Showing posts with label nursery. Show all posts

Wednesday, June 6, 2012

The Nursery - Behind the Scenes

Here are some behind the scenes pictures of our nursery.  Hopefully you can see how easily things can be transformed with just paint, glue, tape and paper.  No special skills or tools required!  Just some confidence and courage to go for it!

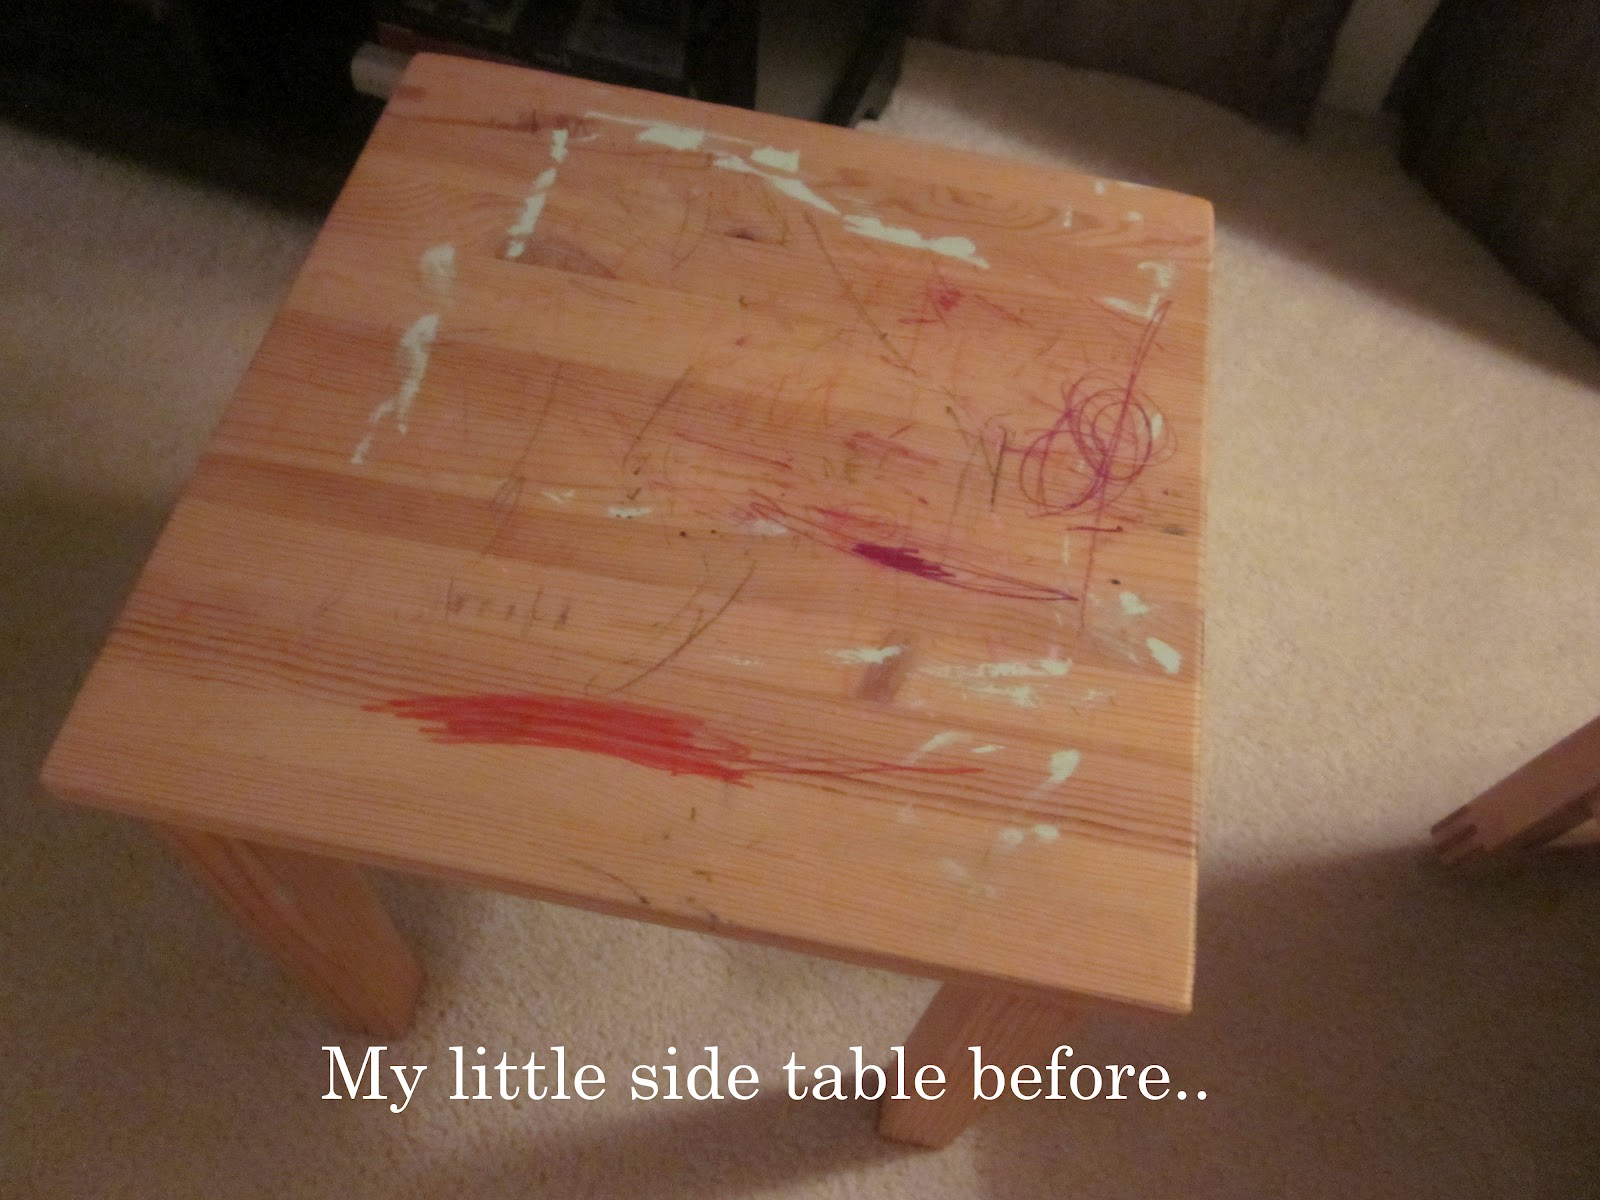
First... the side table:


Now the dresser...


Lastly...  free art!


Just framed 2 pieces of left over paper. 


download this free printable here

Sources:
Crib/Dresser:  Given to us by friends
Crib bedding:  Pottery Barn Kids

Chair/Side Table/Tray:  IKEA
Rug:  Urban Outfitters
Pillows:  Pottery Barn
Paper used for poms, pennants, table:  Paper Source, Impress Rubber Stamps, Packaging Specialties
Lamp:  Target

Paints:
Benjamin Moore Robins Nest
Rustoleum Gloss Sun Yellow

Monday, June 4, 2012

Our Little, Happy Nursery

I've been in major nesting mode this past week and I'm so happy to share with you the fruits of our hardwork and hubby's willingness to hang pics and move furniture.  :)

Our nursery for "quattro" is simply the otherside of our master bedroom.  Ironically, we've never had an official nursery or baby room for any of our kids.  We were either moving shortly after a baby or just moved so we never got around to it.  AND... we love having our babies close to us, so it was never a necessity.  So, this is the closest I've ever gotten to full on decorating a nursery.  So fun!

One of the things I'm most proud of is that I hardly spent any money putting this side of the room together.  All in all... the most I spent was maybe $5 getting paper to make our little pennants!  Really! I'll explain more in the pics below.


Isn't this before photo scary?  The side of the room really fell apart.  It really became a catch-all for all sorts of stuff. 


These pom poms were the first pieces of "decor" I had for the space.  These were up at my baby shower and my friend graciously let me use them for our nursery.  This was the jumping off point for the color palette.


Next, I moved these two pinboards from my office area.  I originally bought the frames for a few dollars at Goodwill.  I already painted them yellow and I knew it they would work perfectly.  I bought just a few pieces of scrapbook paper and twine for the pennants. 


This lamp and tray were also moved from my office.  Here's the back story on the lamp.


My "runner" is just left over fabric from the drapery panels in our loft. 
* sometimes it pays to hold to everything!  :)


The last piece I have on this dresser is a vase containing sweet notes written by friends at the baby shower.  So meaningful and simple.


This dresser is was the biggest diy project and even this was super easy.  I put out a call for a dresser that someone might be wanting to get rid of.  A friend came through and after just one night of painting, this little one has found a perfect home in our nursery.  Nothing was bought.  I used leftover paint from my daughters room and used the same yellow spray paint from the frames for the knobs!


On the other side of the crib, I have a rocking chair and a lil' side table.  Both the chair and the table have been shoved into other rooms, just hoping to find a home one day.  They've been cleaned up and look great together. 


The green and yellow pillow are from our family room.  I simply wrapped a piece of leftover fabric around the yellow pillow and the cross-stiched pillow is mine, made for me by my grandmother when I was a baby.


There you have it!  I love this new space and especially the colors.  It feels calming and happy and is a joy to look at from our bed.  I finally feel like we're ready for quattro!
 
I'll be posting some behind the scenes photos tomorrow and list out the sources for furniture, artwork and accessories. 

Thursday, March 8, 2012

Oh Joy! Oh What a Nursery!

(via ohjoy.blogs.com)

While catching up on my blog reading, I came across this post from Oh Joy.  This post features Joy's nursery for her little baby girl, Ruby.  Wow.  First of all, I shouldn't be surprised.  Joy has impeccable style. (I just want to swap closets with her!)  Secondly, loved seeing that her color scheme is similiar to Evie's room!  

Now, THIS is what I mean by timeless decorating, especially in a kids' rooms.  I love that there's a movement toward more sophistication in kids design.  Not in a snooty way, but in a way that truly celebrates the freedom, joy and imagination of childhood and not trying to compartmentalize it with some theme.  Plus, in the end, I really think this is a much more economical way to decorate.  Keep the big pieces neutral and classic and change out the accessories.

My favorite part of the nursery?  That amazing chest of drawers!  Seriously, Craigslist?  How come I never find stuff like that? 

(via ohjoy.blogs.com)

Well, since my chances of finding something similiar to that dresser is zero to none, I'm feeling a DIY project coming on.  I'm seeing an IKEA Rast or Koppang dresser, drawer fronts painted with some fab hardware like in this tutorial...Ta dah!

Now if anyone sees this again on Craiglist, tell me!  In the meantime, I'm off to find an IKEA dresser on craigslist.  :)

Have a great weekend!

Tuesday, June 14, 2011

How To Paint a Scalloped Border

So here it goes, pictures of Evie's ceiling project.  I love how the final product turned out.  It's fresh, a little whimsical and just happy.  Again, the color is Robins Nest from Benjamin Moore.  The final picture doesn't quite do it justice.  It looks much better in person, and there are many more projects left to do.  You'll notice that the ceiling light is next on my list.  :)


This project was fairly easy.  I broke it down into several steps and each step took about an hour and a half.  Most of time I started around 11 and ended up in bed at a somewhat reasonable hour.  :P  The actual painting part was pretty easy and surprisingly relaxing, especially with the house being so quiet.  I used a 1 1/2 in. stiff angled brush.  Worked great!


Here's how I did it:


The white trim was actually an after thought.  I was not completely sold on the scalloping initially and was a little worried.  I was hoping that a little white paint would jazz it up and it totally did the trick!

Monday, June 13, 2011

WHY IT WORKS - Norah's Nursery

I'm happy to report we made great progress on Evie's room last week!  We painted the ceiling and the scalloped border.  I'll be posting pictures tomorrow.

This photo of Norah's Nursery was one of inspirations for the color palette for Evie's room.  This one of the first photos I saw on ohdeedoh and always thought I would come back to it.  Here's what else I love about this room!


WHY IT WORKS:

  • The wall color, Robins Nest by Benjamin Moore is really beautiful!  This was one of the few times that I did not do a test patch before buying a whole can.  I just fell in love with the color.  We used it on the ceiling only and left the wall color as is, a creamy off white.  It did not dissapoint, I love the color in Evie's room.  It looks soft, bright and happy, perfect for a kids room.  I'd totally recommend this color if you're considering it.
  • Yellow accents.  Did you see that adorable crib?  That bright yellow is the perfect complement to the soft blue/green.  I'm hoping to put in some bright accents into Evie's room through some accent painting on furniture and maybe bright yellow grosgrain ribbon on a white lampshade.
  • Window treatment.  I love the simple valances that can be made from any fabric slipped through a simple rod.  I'd just need to finish off the edges and sew a little pocket for the rod.

(via ohdeedoh)

Click here for the full tour of Norah's lovely space.


Monday, June 6, 2011

WHY IT WORKS - A non example

Hello there!

This post will be a little different from the typical WHY IT WORKS posts. I'm going to be taking a little break from blogging this week so that we can focus on some projects that we have not been able to get to in months! I was giving someone a housetour this weekend and was so embarrased at what a mess our upstairs has become. We have so many unfinished projects!

So the time after the kids go to bed that I would normally spend blogging, will be spent prepping and painting and moving furniture. Hopefully I will have some improved "after" shots by the end of the week. Nothing like a deadline to keep us going!

Here's a WHY IT DOES NOT WORK example for our house. It's our guest room that we're going to turn into my daughter's room.  There are so many things that are not working in this space, I won't take the time to break it down.  :)


The first step will be paint.  Here's my inspiration:  I want to create a scallop border ceiling like in this photo.


(via)

Using Robin's Nest from Benjamin Moore.


I'll be back soon with some updates!

Friday, April 1, 2011

IKEA FRIDAYS - Meet MALM


For those of you who are IKEA loyalists, MALM will be familiar to you.  This is one of IKEA's classic bedroom series.  MALM is like the basic white shirt.  Its clean lines will never go out of style and goes with everything.  On Monday, I wrote about being creative with console tables, a dresser like MALM is just what I'm talking about.  Imagine all the extra storage you'd be getting!

Last week when I was at my local IKEA, I saw it priced at $179, but it also had a "last chance" sign next to it.  I imagine they might be just discontinuing a certain color and not getting rid of the whole line.  If you've been eyeing a MALM dresser, it might be a good idea to check with your local IKEA.  Better be safe than sorry.  :)

Here's some pictures of MALM all dolled up.


(via apartmenttherapy.com)

I love how fabulous MALM looks just by adding 6 pulls!
  
(via ohdeedoh.com)


(via ohdeedoh.com)


(via ikea.com)


Monday, March 21, 2011

WHY IT WORKS - Penelope's Room

I've mentioned before that I've been collecting design ideas as we put together a room for my 1 1/2 year old daughter, Evie. I'm so excited! Nothing like a redecorating project to get those creative juices flowing. My husband on the other hand is bracing himself for some DIY weekends. :)

Here's a photo I found via ohdeedoh that I find oh so inspiring.  Here's what I love about this room:

WHY IT WORKS:

(via melissaesplin.com)

  • The Color Palette.  I'm particularly fond of non-pink room for little girls.  I just love that it's unexpected and fresh.  Isn't the peach, orange and yellows in this room so charming?
  • Wall Treatment.  I really love the scalloped border.  So eye catching and graphic.  Melissa created this one using contact paper.  I'm leaning towards just painting the ceiling in Evie's room and keeping the walls off-white.  I think I could create the same effect with paint.
  • Repitition of Color.  The best way to give your room a put together feel is to have your splashes of color spread throughout the room.  I like to have the colors talk to each other.  :)

INSPIRATION:

  • Paint Treatments.  There are so many fun ways to work with paint.  Paint is THE cheapest way to change a room and there are a ton of great ideas out there for using paint in unexpected ways.  I've been so happy with our painted striped walls.  I've also seen some great stencils, like these ones here.  The scallops here is just another great idea.  Again, Melissa used contact paper, but once you make a template, you could easily do this with paint.  Click here for her tutorial.
  • White furniture.  Use white as a unifying color to bring all your different pieces of furniture together.  White paint or spray paint is easy to use and you can't go wrong.  White furniture will work in any space, any time.
  • Splashes of color.  The best and most economical way to bring in color is through large pieces that can be changed and isn't a forever investment.  Rugs, bedding, artwork, pillows are all high impact, low commitment ways to bring great color into a room.


Click here to see more of Penelope's nursery. 


LinkWithin

Related Posts Plugin for WordPress, Blogger...